Save-the-Dates & Invitations

1

Choose your format

Save-the-date cards and invitations don’t just share essential information, they also serve as your wedding’s first teaser, offering a preview of what’s ahead. Opt for chic paper stationery or take the practical digital approach. Alternatively, consider digital save-the-dates paired with formal paper invitations.

Paper advantages
  • Traditional elegance and a sense of ‘touch’
  • Keepsake quality
  • Better for guests who aren’t tech-savvy
Digital advantages
  • Eco-friendly with no paper waste
  • Quick, easy and cost-effective (typically 80% cheaper than paper)
  • Simplified tracking and direct links to your wedding website
  • Easy to update if details change
2

Design Your Save-the-Dates

To choose your wedding “suite” design, start by considering your wedding’s overall style, whether it’s formal or casual, and then think about your chosen colors and theme.

Essential information to include in a save-the-date
  • Your full names
  • Wedding date
  • City and state/country location
  • “Formal invitation to follow” statement
  • Wedding website URL (tip: start working on a website once you know your venue and your date)
Design considerations
  • Match the style and formality of your wedding
  • Consider adding a photo or custom artwork
  • Choose colors aligned with your wedding palette
3

Order and Send Save-the-Dates

Timeline for ordering
  • Begin design process 1-3 months before sending
  • Allow 2-3 weeks for production if using paper
When to send
  • Destination wedding: 8-12 months before the wedding
  • Local wedding: 4-8 months before the wedding
For paper save-the-dates
For digital save-the-dates
4

Plan Your Invitation Suite

For paper invitations you’ll need
  • Main invitation card
  • RSVP card with pre-stamped return envelope
  • Direction/map card (if needed)
  • Reception card (if at different venue)
  • Accommodations card (optional)
  • Weekend itinerary (especially for destination weddings)
  • Inner envelope with or without “belly band” (optional)
  • Details card for additional information (optional)
For digital invitations you’ll need
  • All-in-one digital invitation with RSVP function
  • Links to wedding website with all additional information
  • Mobile-friendly design
5

Design Your Wedding Invitations

Essential information to include
  • Host names (traditionally who’s paying, but it could also include both sets of parents, or read something like “Together with their families — invite you to their wedding”)
  • Couple’s full names
  • Date and time
  • Venue name and complete address
  • Reception details
  • Dress code (in lower right corner or on details card)
  • RSVP instructions and deadline


If you’re having a sit-down dinner with multiple entree choices, include the choices on the RSVP card so that people can check or circle their desired option. Our venue, for example, offers all guests four entrée choices.

6

Invitation Do’s and Don’ts

Historically, wedding invitation etiquette dictates archaic approaches (“Mr. and Mrs. John Smith,” or omitting the bride’s last name as it was assumed she’d take her husband’s, etc). However, times change, making way for more flexible approaches, including alphabetizing names, using a design that emphasizes the couple, or listing both sets of parents, regardless of who is hosting.

What NOT to include
  • Registry information (put this on your wedding website)
  • “No children” phrases. Instead, address invitations precisely to invited guests, or use a cordial “Please note this will be an adults-only celebration.”
Design considerations
  • Choose paper weight, texture, and quality (for paper invitations)
  • Select fonts that reflect your wedding style
  • Consider special elements like calligraphy, custom artwork, or wax seals (for inner envelopes only)
7

Order and Prepare Invitations

Timeline
  • Begin design process approximately 6 months before the wedding
  • Order invitations 3-4 months before the wedding
  • Allow 4-6 weeks for production of paper invitations
For paper inviations
  • Order 15-25% extra for mistakes, additions, and for keepsake
  • Assemble in correct order (main invitation on bottom, smallest items on top)
  • Address outer envelopes formally
  • Add postage to both outer envelope and RSVP envelope
  • Weigh a complete invitation at the post office to ensure correct postage
  • Consider hand-canceling at the post office to prevent machine damage
For digital inviations
  • Finalize design on your chosen platform
  • Test the invitation on different devices before sending
  • Upload your guest email list
  • Prepare to track responses electronically
8

Send Wedding Invitations

When to send
  • Destination wedding: 3-4 months before the wedding
  • Local wedding: 6-8 weeks before the wedding


Set the RSVP deadline one month before your wedding date.

For paper invitations
  • Mail all invitations at once
  • Keep several extras for last-minute additions or replacements, for keepsake, and for your photographer’s flat lay photos
  • Track which invitations may have been returned undeliverable
For digital invitations
  • Schedule delivery
  • Monitor which guests have opened the invitation
  • Send a follow-up to those who haven’t viewed after 1-2 weeks
9

Track and Manage RSVPs

  • Update your spreadsheet as responses arrive
  • Contact guests who haven’t responded one week after the RSVP deadline
  • Finalize guest count for venue and caterers
  • Create a seating chart based on confirmed attendees (Etsy offers a myriad of great options)


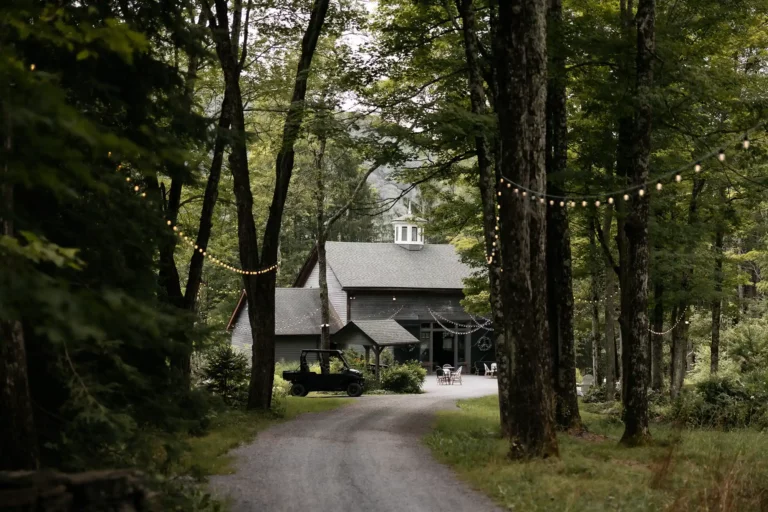
Being a full-range venue ourselves, providing not just the venue, but also all food and beverage services, and wedding coordination from start to finish, Roxbury Barn & Estate will provide a checklist and timeline to help you keep track of each step. We’ll provide you with a tailored guest list template, and we’ll upload your final guest list to our online planning platform, where we will set up a detailed dinner diagram perfectly tailored to your preferences for a streamlined, stress-free process.

10

Send Thank You Cards

  • Order thank you cards when ordering invitations
  • Track gifts received and thank you notes sent in your spreadsheet
  • Send thank you notes within 2-3 weeks of receiving gifts
  • For gifts received after the wedding, send thank you notes within 3 months
11

Special Considerations for Destination Weddings

  • Consider sending a preliminary email to VIP guests even earlier (12+ months)
  • Include detailed travel information in your invitation suite
  • Finalize guest count for venue and caterers
  • Create a comprehensive wedding website with:
    — Travel tips and requirements
    — Accommodation options
    — Local activities and recommendations
    — Detailed weekend itinerary


All couples at our venue receive all the needed up-to-date documentation to inform their guests, with an extensive Lodging List — including 180 of the best accommodations in the area; a detailed list of local activities and recommendations in our area; and detailed driving directions and airport options.

By following this timeline and organization system, you’ll ensure your wedding communications go smoothly, giving guests ample time to plan while keeping your wedding preparations on track.

Happy planning!

Similar Posts